DIY Fireplace Mantel
Sometimes, things don’t last as long as your were hoping. Take our mantel for example. If you saw on my Instagram, you‘d know I had to make the tough decision to say goodbye to my elevator-beam mantel we installed 5 years ago and replace it. Why? Unfortunately, as it‘s an old piece of wood, it was starting to warp and decay from the inside. It is also very heavy and I didn‘t want to risk it warping/decaying to a point that is breaks and falls. It was well bolted to the wall but old wood can be unpredictable. So here we are, time to build a whole new ‘rustic‘ mantel.

Material you need to build your own:
- 3 – 2×6 ripped to 4 1/16 inches (1 will be used as supports cut to 5 inches (8))*
- 2 – 1x10s at 10 feet long (top and bottom)*
- 1 – 1×6 10 feet long (front piece)*
- 2 – 1×6 by 9 1/2″ long (end caps)*
- 4 – Washers
- 4 – Lock washers
- 4 – Nuts
- 4 – Sami/Hangers with 3″ ready rod
- 5/16 drill Bit and 1 1/2 spade bit
- Wood Glue
- Packing tape
- Stain of choice
- Mitre saw (optional)
- Pocket Hole Jig (Optional)
- 60 Grit Sand Paper (optional if you want to round out the edges
- Any tool to “rough” the boards up further
*Rough-cut pine
This can be built many ways. I like to keep things rough and rustic to go with the rest of my decor but you can always use finished pine or a wood of choice to build this. First step is to prep your space. We had to remove the old mantel with was attached with Sami/Hangers and ready rod with access from the bottom. The new mantel will not have access points as it will be hollow and able to live directly onto the supports.


Once the beam has been removed, next is to start building the support system. We use the 2x6s ripped down to 4 1/16. We measured where the original sami hangers were on our wall. If you are building this from scratch, locate your studs and insert the rods. You will need to drill a hole into your wall/stud and then thread the rod in. next, you will thread the ready rod into the sami hanger. Make a centre mark on your board to where you need to drill your holes. You will only need to mark one of the two boards as you will screw them together prior to drilling. To drill the holes, make a pilot hole first using a 5/16th drill bit. We than used the 1 1/2 spade bit so we could counter sink the washers. If you use a 3″ ready rod, you can skip this step – ours were 2 1/2 inches from the previous mantel so had to do this.


Use 3′ wood screws to hold you two boards together and start drilling. Once holes have been made, you can slide the two boards onto the ready rod. You will then use the washers, locking washers, and nuts to secure the support to the wall.


Next up is to build the mantel. We mitred all the edges but this is not needed. We prefer the edges to appear as if they are one piece but if you do no have a mitre saw, you can skip this part. First, you will take the 2 – 1x10s and 1- 1×6 and lay them flat so the 1×6 is in-between the two. We use packing tape to hold all the boards together prior to folding them into each other. The tape will help the boards to not slip apart once the glue is applied.


Run a bead of wood glue along the edges of the top, bottom, and front panels. Fold them up and put spacers inside the mantel to prevent sagging. Tale the 2 1×6 end caps and glue them to the ends and wrap again with tape tp hold. If you have a brad nailer, you can put in a couple of nails along all the seams to make sure they are extra secure. Let the glue dry for a minimum of 8 hours before removing the tape. Use wood filler (or sawdust mixed with glue) to fill in any gaps along to seams.
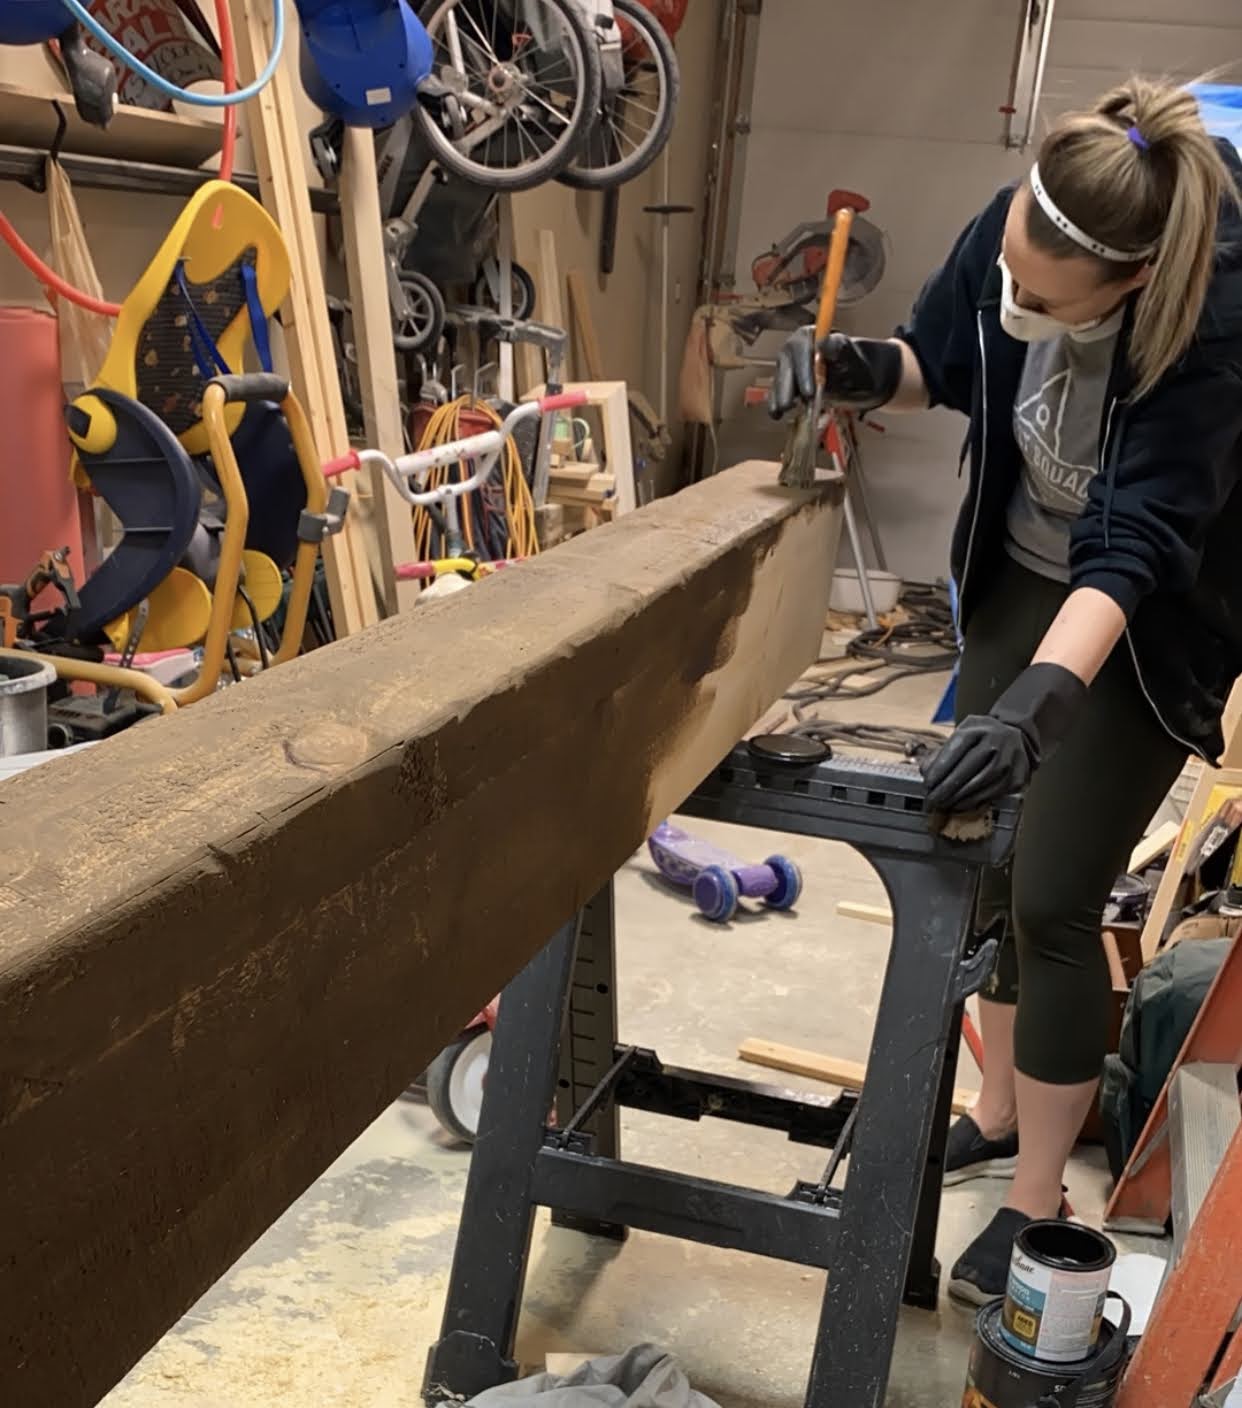
Now comes the fun part. Once it’s completely dry, it’s time to destress the wood. Again, you can skip this part if you wanted a more smooth finish. If you want a smooth finish, I recommend sanding with 80 grit and work your was to 320 grit. If you want to keep it aged, skip sanding. For this part, I used multiple tools: anything to really “bang” up the wood. You can use a chisel to chisel out the hard edges, or a hammer, or a wrench. just about anything will work. I also use my sanding to create deep “grooves” along the edges but turning and digging the sander into the wood.


While the stain drys, I went ahead and attached the extra supports to the main support. I used the pock hole system for this but if you don’t own a pocketful jig, you can always just angle your screws in on each side of the board. Pocket holes just create a pocket to go into and I find, gives a stronger hold.


It’s time to finally put the mantel up. This is the easiest part. Just slide that baby onto the supports and push it on! It if feels too snug, you can sand down the supports very lightly: you want a snug fit just to ensure it won’t “slip off”. As an added safety measure, you can use a brad nailer to nail it to the supports once it is on. We left ours without just in case we have to remove it in the future.

And there we have it! A newly build, aged Mantel. I am in love with how it turned out and counting how many days it takes my kids to notice that it’s a new beam! So what do you think? If you love it or think you may try this build, let me know in the comments below! I’d love to see how it turns out! Or if you have any questions, feel free to ask and I will do my best to answer!


Cheers! – Jenna